You can no longer trust your numbers. Whether it’s Apple limiting cookies to 7 days, GDPR/CCPA forcing annoying cookie notices or some 27% of people surfing the web with ad blockers, the ongoing privacy backlash is poking holes in our ability to track user behavior. Of course as an industry we brought a lot of this on ourselves, but now the effects are spilling over even to legitimate use cases from well behaved companies.
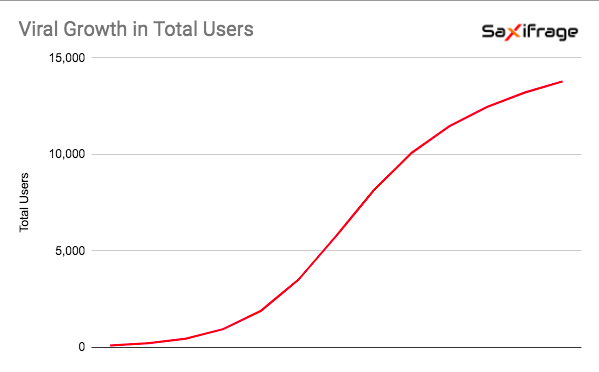
For example if I simply want to track how many people come back each week to read my blog, I can’t get an accurate measure of returning users. If it has been more than 7 days since they read the blog on their iPhone, they’ll show up as a ‘new’ user – if they’re using an ad blocker they might not show up at all! As a fledgling business, the numbers are extremely important to me. It’s how I tell if I’m doing a good job at writing content people want to read. I agree we need to dial down the creepiness of tracking people across the web, but can you imagine trying to run a store if you couldn’t see when people walk in the door?
Thankfully this arms race between tech giants is also producing heaps of innovation in the space, with the biggest change being the advent of Server-Side tracking. Google announced in January a new form of Google Tag Manager container that lives on the server, Facebook started pushing it’s Conversions API, and Shopify announced a native integration to push ecommerce sales to Facebook server-side, with surely more platforms to follow. Server-side tracking means your tracking scripts don’t run in the browser where they can be easily blocked – they move to the cloud running in a server you control, which can also extend the life of your cookies!
Benefits of Server-Side
One of the main reasons these companies are moving to server-side implementations, is to get back visibility into tracking which users converted on the website after viewing or clicking on an ad. Without this visibility online advertising channels won’t work as well, and that means billions of lost revenue for Facebook, Google, Shopify and the small businesses that rely on them.
However there are more benefits to server-side tracking than just visibility on ad performance. If anything it gives us more control to deliver on user privacy, and even improve user experience.
- Speed – Fewer measurement tags on your website means less code to run client-side, which should increase page load speed (good for conversion rate and SEO!).
- Security – With no 3rd-party vendor’s scripts on your website, that’s one less attack vector. They can’t inject content into your site or track anything you don’t want them to.
- Control – Now you can decide what data gets stored and sent. I don’t recommend using this to abuse user’s right to privacy, but instead to track key events anonymously
There are myriad benefits to moving your tracking server-side, and of course with more power becomes more potential for abuse. I wouldn’t be surprised if we see companies having to hand over the keys to their servers to be audited by Apple or the EU to ensure they aren’t violating user privacy, given that the tracking process is now far more opaque.
Rather than seeing server-side as a workaround, I recommend instead you focus on legitimate uses that let you still track key events like pageviews, purchases and signups. When you track anything, it should be anonymous by default. I suggest you employ the principle of least privilege, and only track absolutely what you need – most companies barely look at the majority of the data they collect anyway!
There are downsides to server-side tracking to consider. One is the cost – this requires setting up a server on the Google cloud platform, which can cost anything from $20 to $200+ per month depending on your traffic. If you’re a small website of less than 10,000 visitors a month, chances are you’ll pay nothing for years, with the $300 free credit you get for signing up. In addition, it’s far more technically complex to set up than traditional Google Tag Manager, and it is still in beta. If you aren’t a developer or don’t have someone technical in your team, you may struggle.
Setting Up Server-Side Tracking
To get a Google Tag Manager server-side tracking container live, I recommend both the official Google documentation and Simo Ahava’s fantastic guide – this is what I followed when setting mine up. I’ll walk through how it all worked and hopefully this post can serve as a more accessible tutorial to getting started.
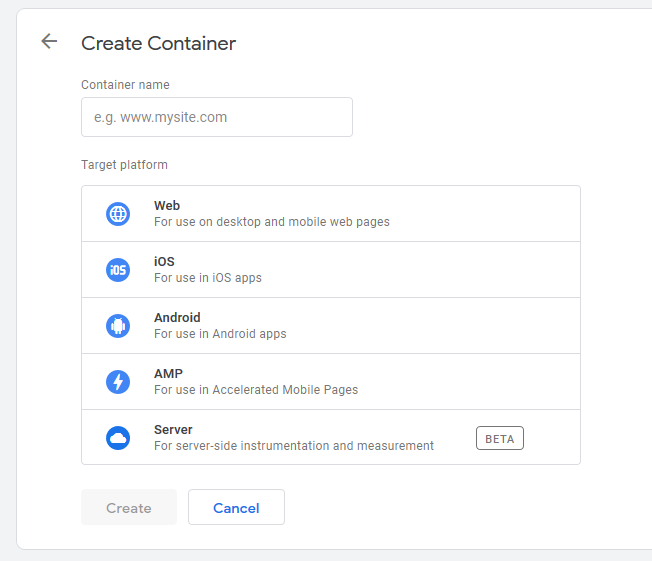
Step 1: Create a server container
Log in to Google Tag Manager and click on the right ellipses menu, then select Create Container from the dropdown menu.
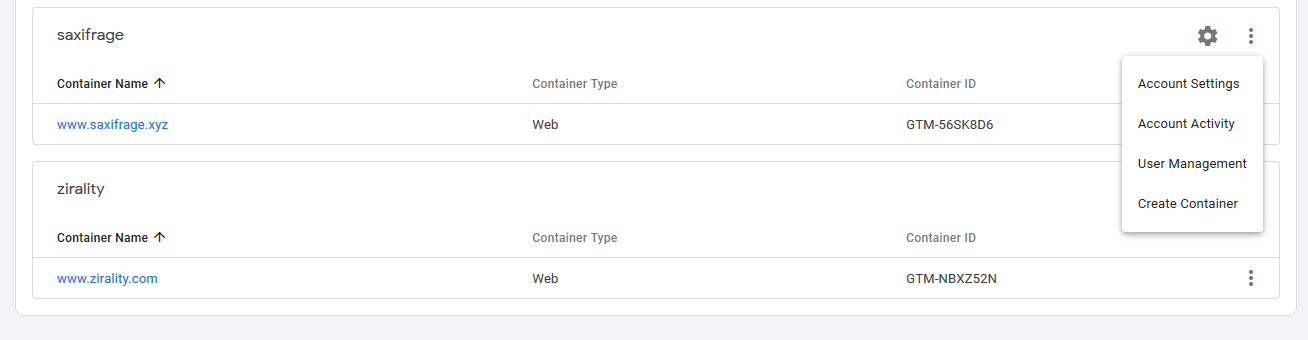
You want to create one of the new Server containers, which as of the time of writing is still in beta.
Step 2: Add a billing account and create the server
Next they’re going to ask you for a billing account – this is to pay for the Google Cloud Platform storage, for which you should get a $300 free credit if you’re new to the platform.
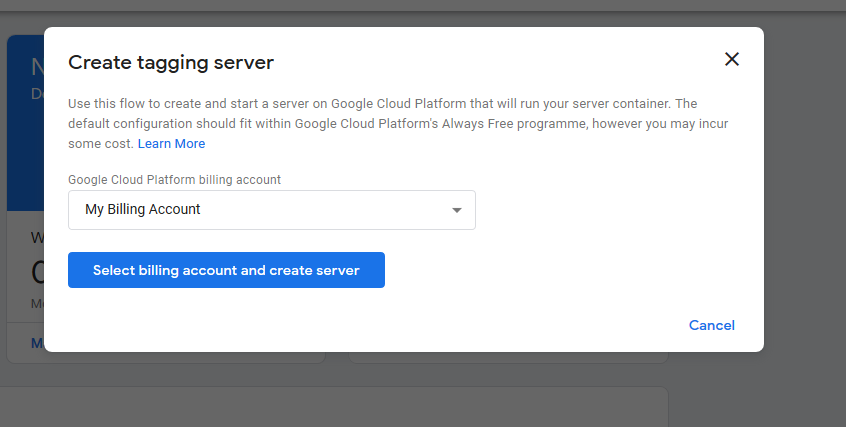
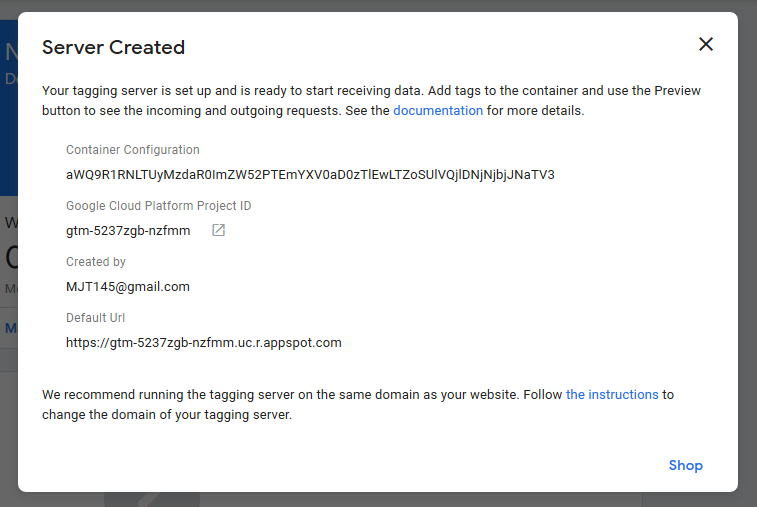
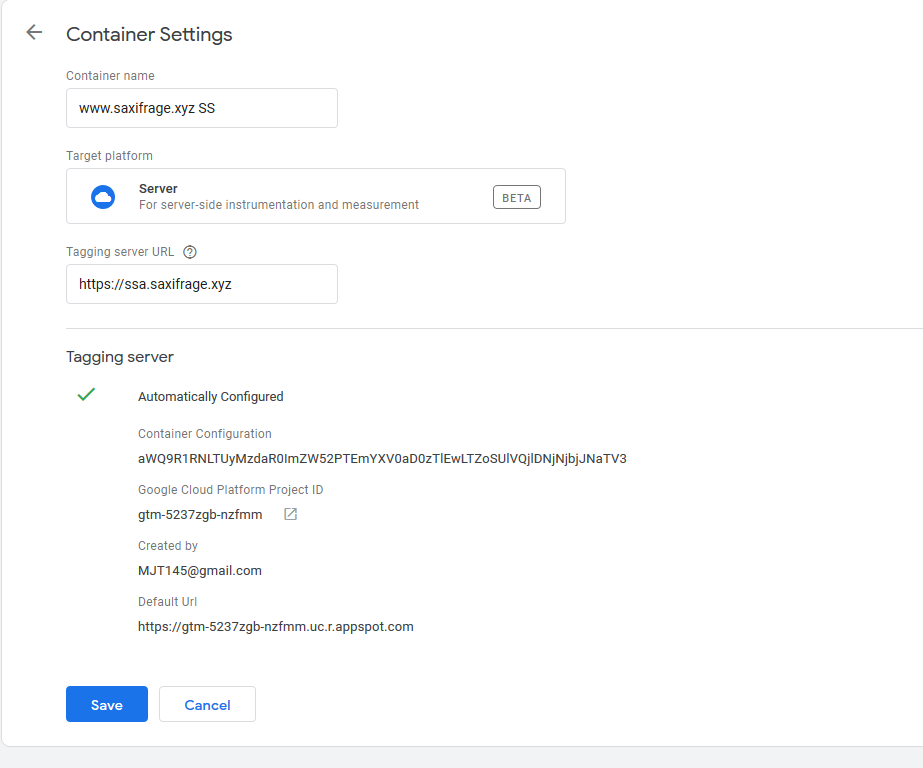
Once you create a server with the default details, you’ll see it takes some time, but you’ll eventually get to a screen that tells you the server was created. Make a note of the Cloud Platform Project ID and the Default URL.
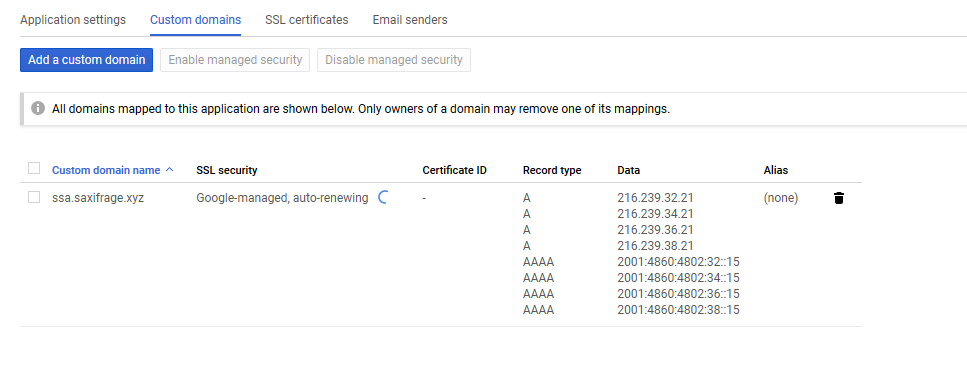
Step 3: Set up a custom domain (optional)
It’s at this stage I recommend you follow the instructions to add your own custom subdomain to run the server on. This step is important because it allows you to set cookies in a 1st-party context. This means your tracking events will fire to something like analytics.yourdomain.com, and any cookies your server sets will be able to bypass the 7 day cookie rule on Safari.
Google will give you various TXT and A records you need to add with your domain provider (mine was GoDaddy), and when you’re finished you can validate it worked. With this step you will be sending data to your own domain rather than a third party, so you can take full advantage of the power of server-side. Once you’re done adding a custom domain, you might want to leave it for an hour, because it takes some time for Google to provision your SSL security certificate.
Step 4: Set up your triggers and tags
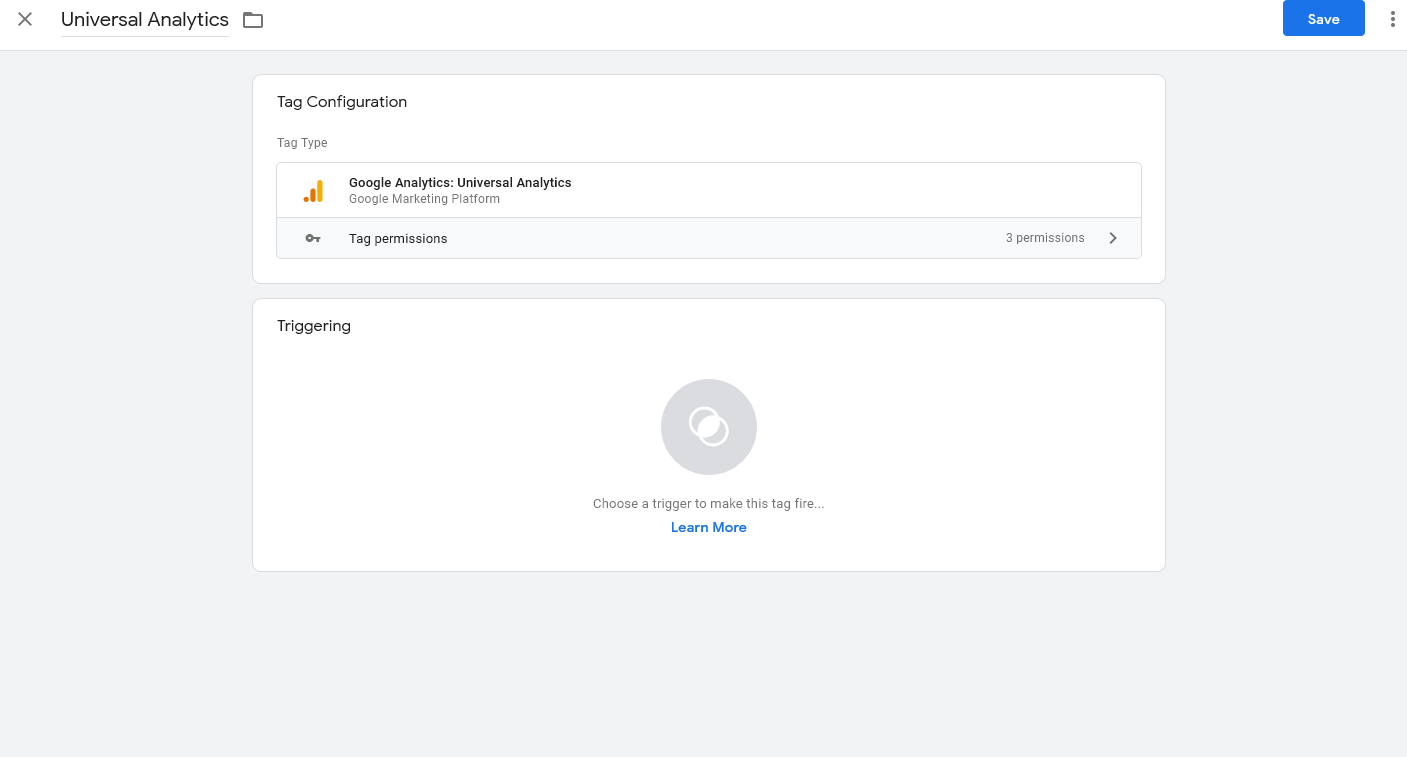
Now it’s time to set up your triggers and tags. This part works fairly similarly to how GTM works on the web, so it shouldn’t be too unfamiliar. Google Analytics is the easiest tool to set up in Server Side GTM, so let’s focus on that. Go to Tags and create a new tag. Choose Google Analytics: Universal Analytics.
Then you want to click in the Triggering section to add a new Trigger. This is far simpler than most Triggers in the web containers, because there are less options. For the Custom trigger choose ‘Some Events’ and make the Client Name equal to Universal Analytics.
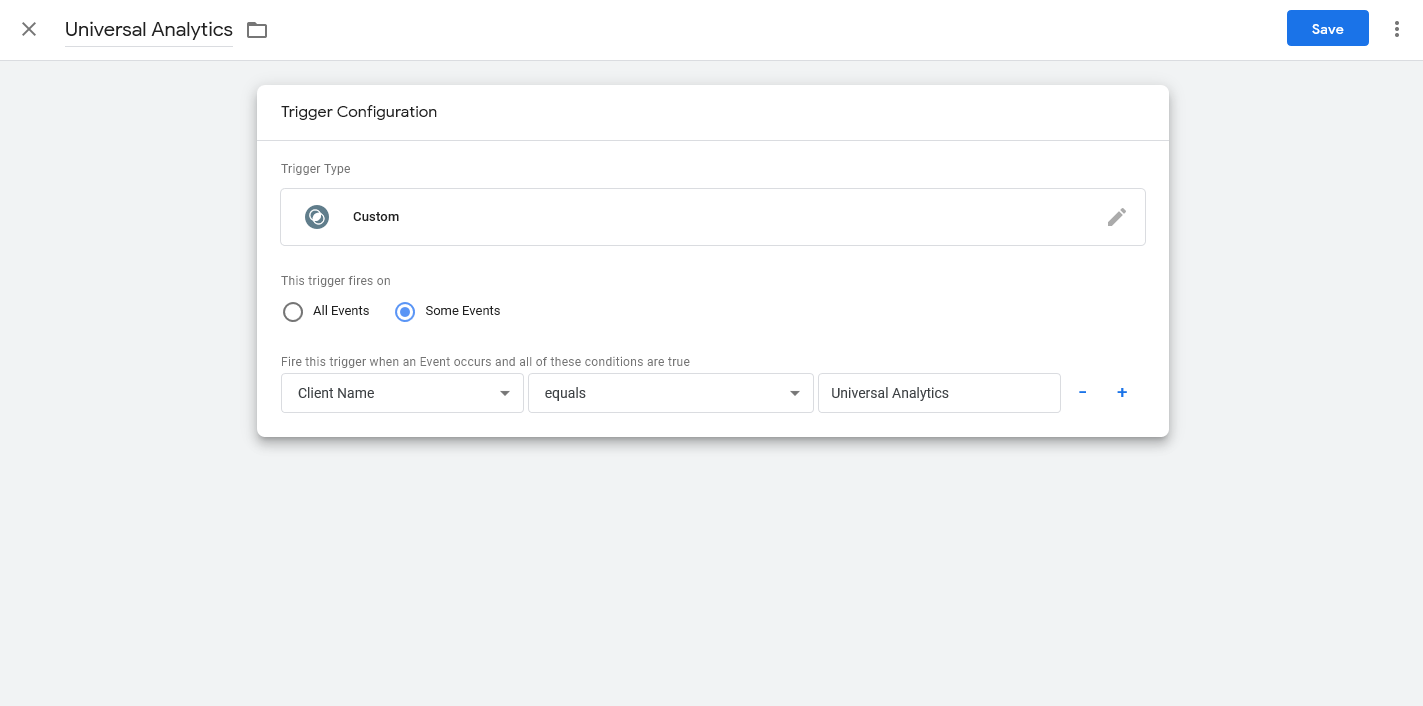
The Client is what grabs your incoming data and ‘claims’ it, to run certain rules on. In this case we’re just using the default Universal Analytics client, so we don’t need to make any edits – when we send a hit in the right format for the GA measurement protocol, it’ll get claimed by this Client.
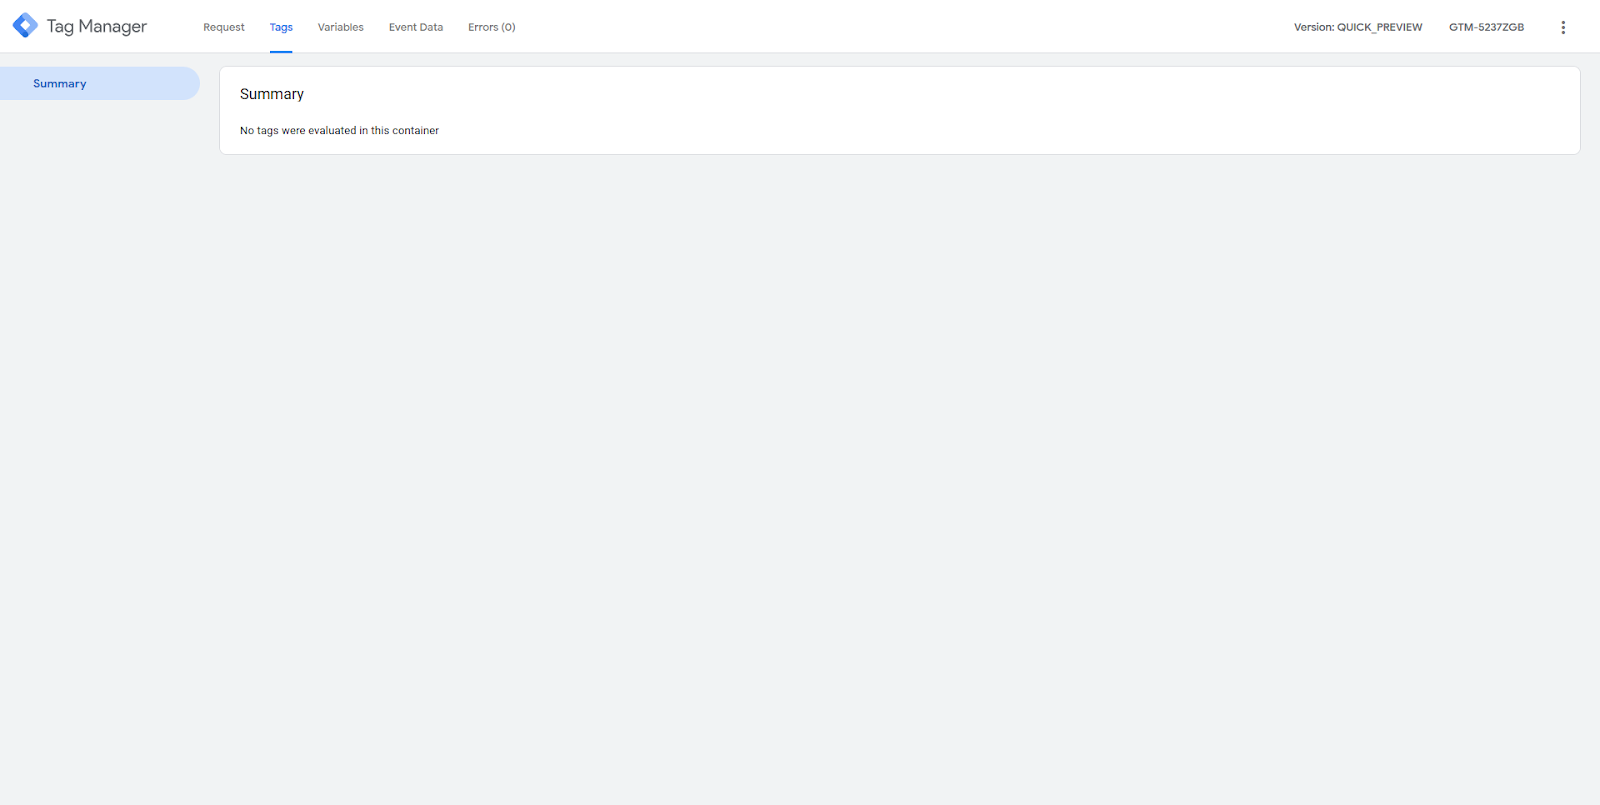
Step 5: Test your container is working
Now is a good time to check the container is working as promised. If you click the Preview button you should see a screen like this load up. If it’s giving you an error you might need to wait an hour until Google provisions your SSL certificate.
Now let’s go to the GA Dev Tools Hit Builder, to create a measurement protocol endpoint to send our data to so we can test our setup.
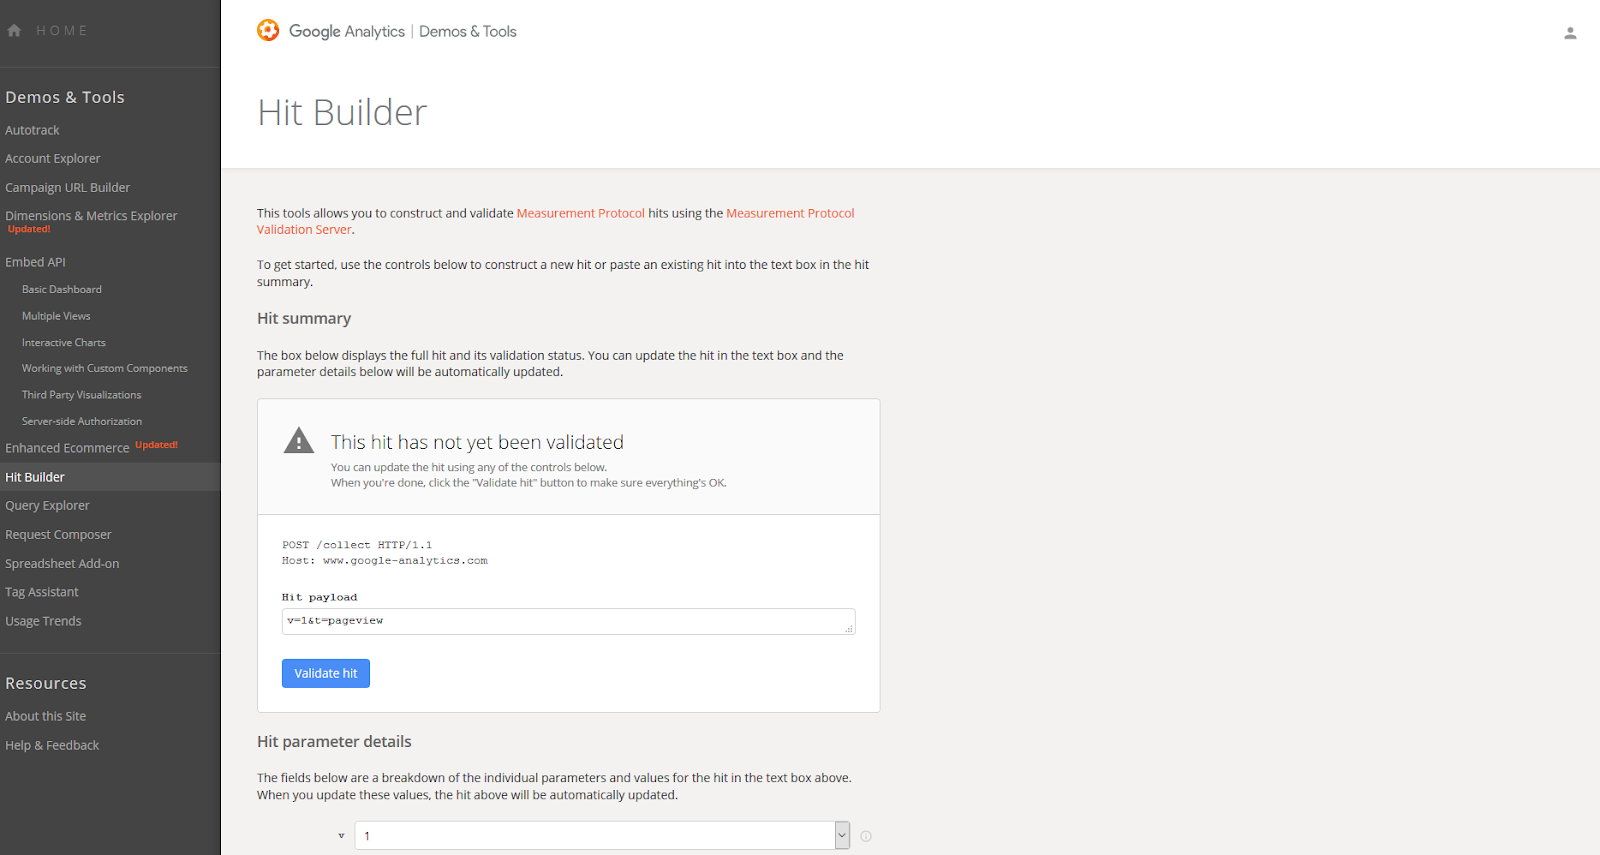
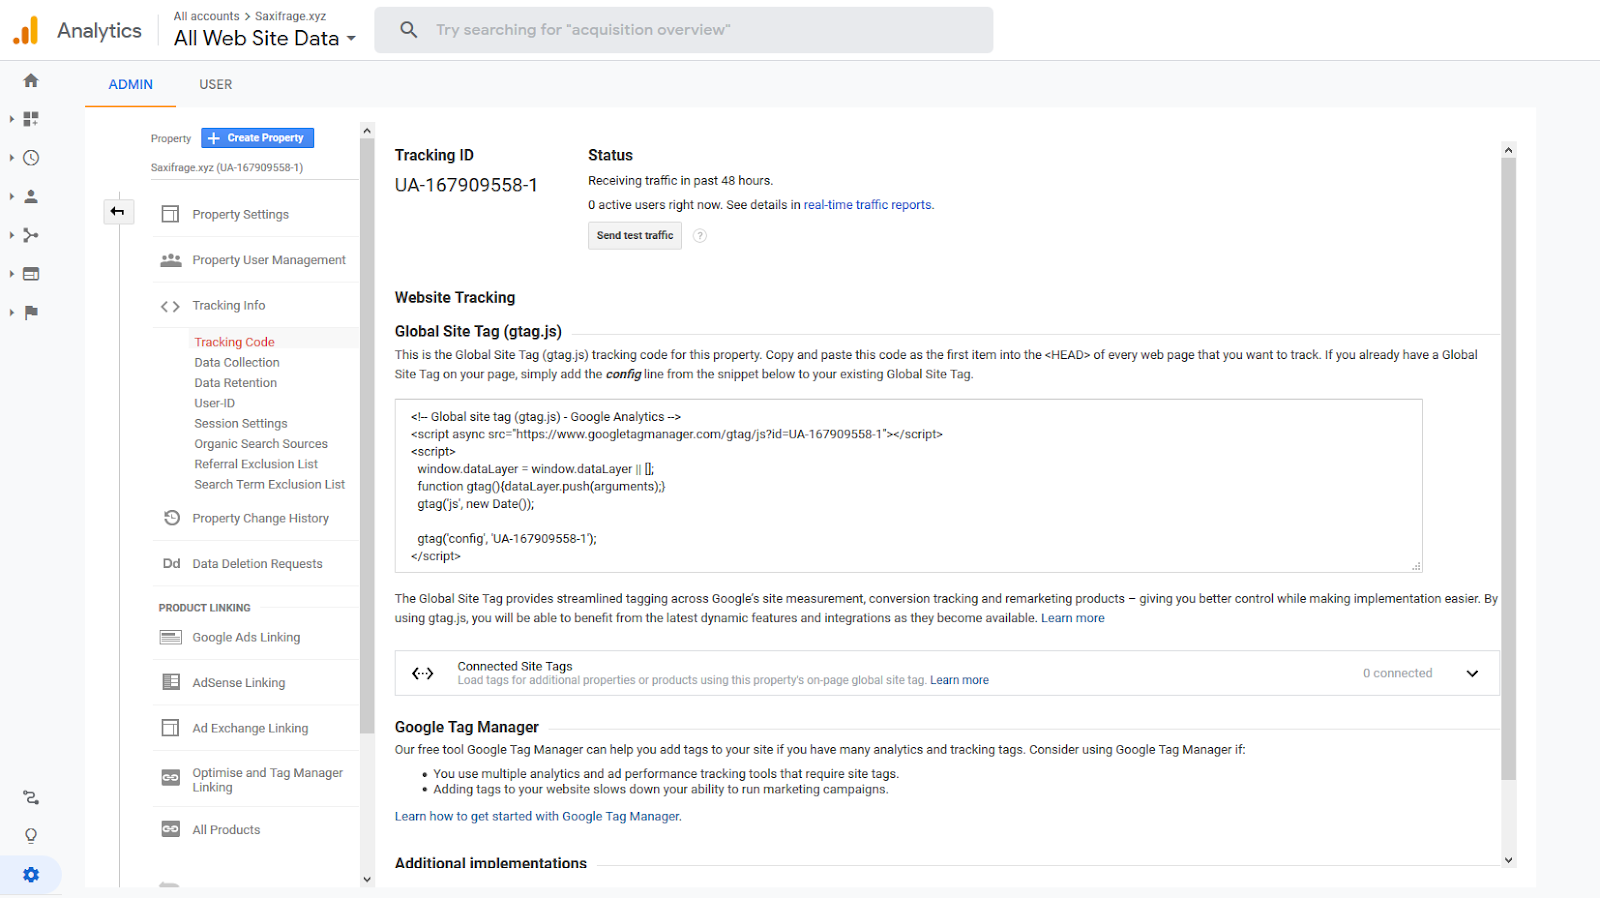
You’ll want to create a Google Analytics account if you haven’t already and grab the tracking ID of the account (starting with UA-) so we can send the hit and see it show up in our analytics.
To build the hit, add your tracking ID in the tid field, add a dummy user ID (‘1.2.3.4’ works fine) and add the dl parameter with a location of a page on your website. Note I used a fake page /test_page so make sure I could easily see the hit in my Analytics account. Validate the hit then click ‘Copy shareable link to hit’.
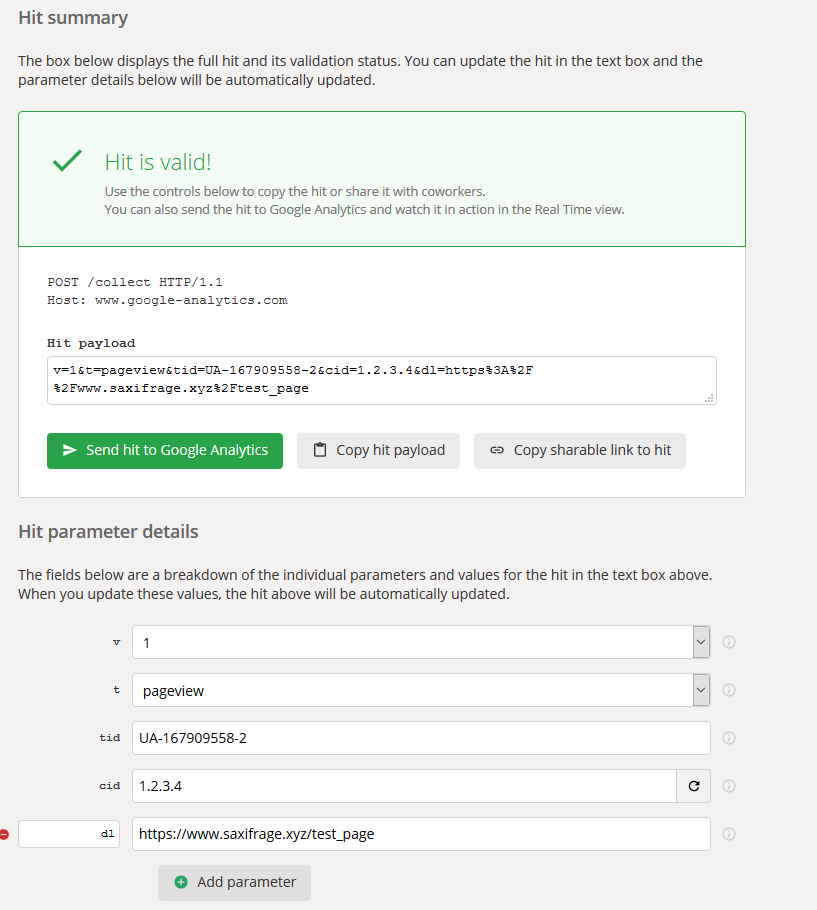
That should give you a URL like this one:
You want to remove the ‘https://ga-dev-tools.appspot.com/hit-builder/’ part and replace it with your own URL that you set server side tracking up with. For me it was ssa.saxifrage.xyz because that’s the custom domain I used, but for you it will be something different.
If you didn’t set a custom domain and didn’t note the URL they gave you when you created the server, just visit the Container Settings in GTM and it’s the Default URL at the bottom.
Now when you visit the URL you built with the hit builder (after swapping out the ga-dev-tools part for your custom domain or Default URL), you can go back to preview mode and see a hit.
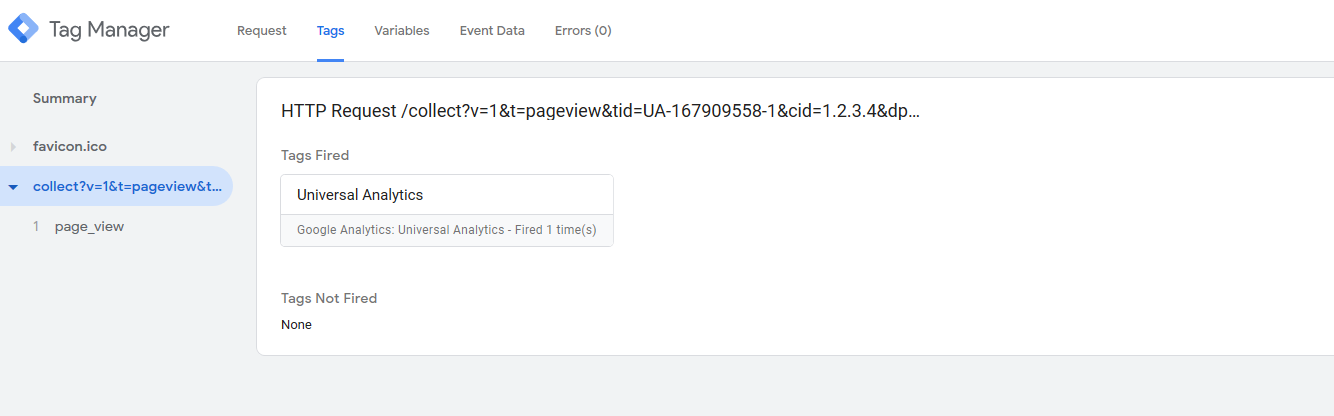
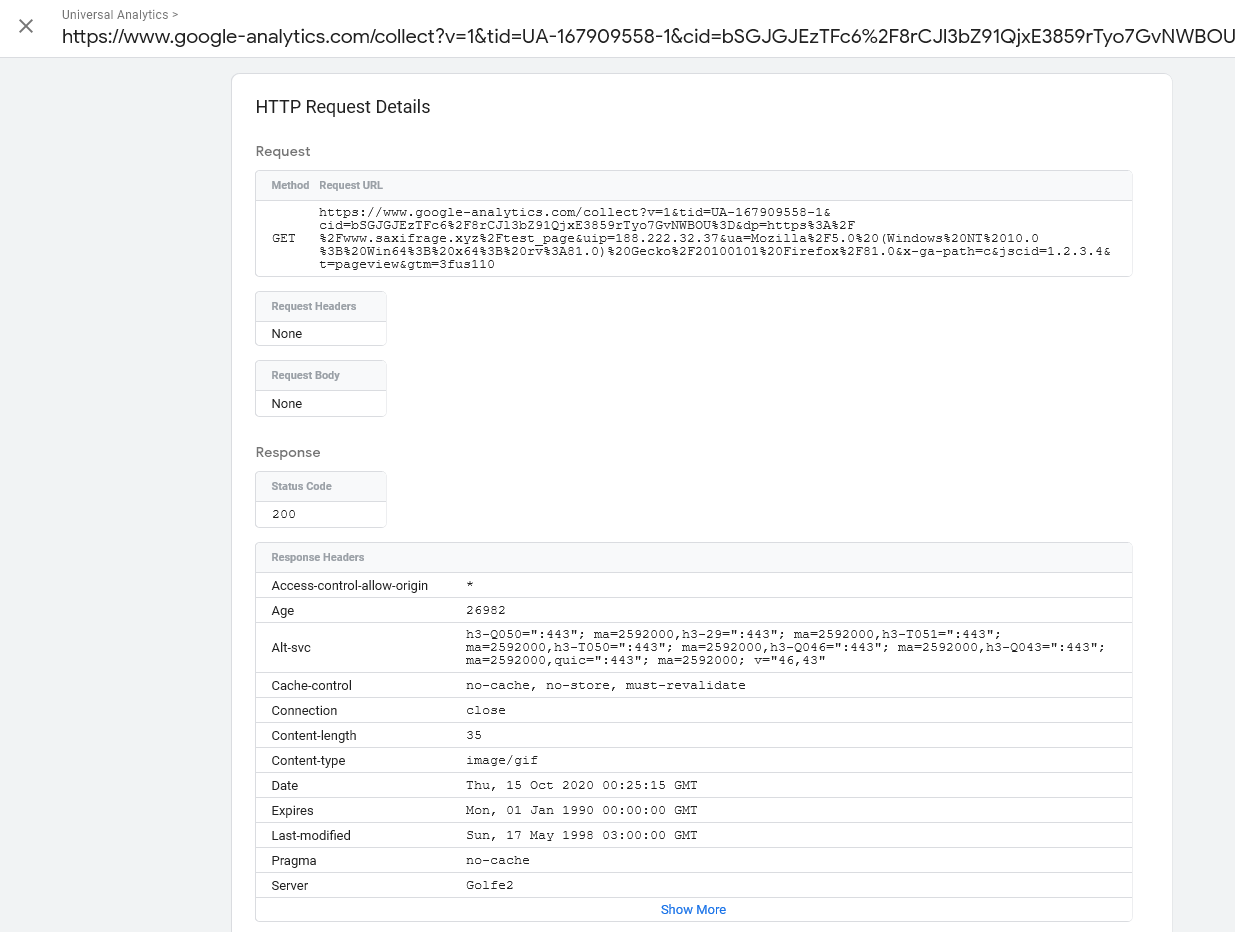
For more detail of what was fired you can click into the page_view event and see how the data was processed (if at all) and where it was sent, what the headers were and response code, etc.
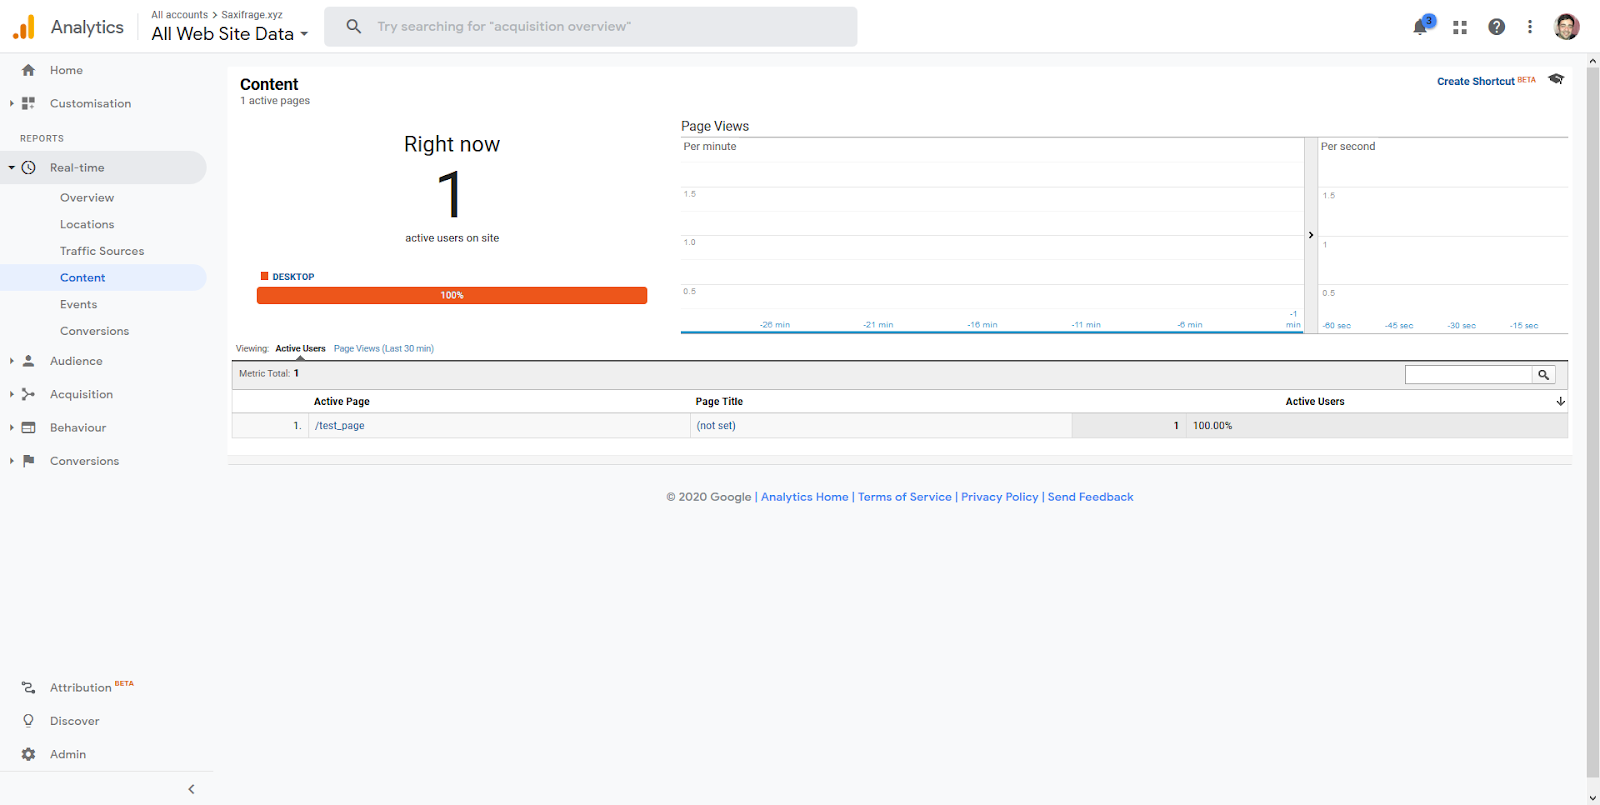
The true test however is seeing the data show up in Google Analytics in the Realtime section. If you used a test_page like I did it should be easy to distinguish the hit in the Realtime > Content section. It should show up as 1 active user on site, for that page.
Step 6: Finish configuring your tags
Finally the last step you need is to fire the data from your website into the new server side container, which is what we just simulated with the measurement protocol hit. Switch back now to your client side Google Tag Manager container, which is where we’ll track the data as usual and send it to our client side container, which then sends it to Universal Analytics.
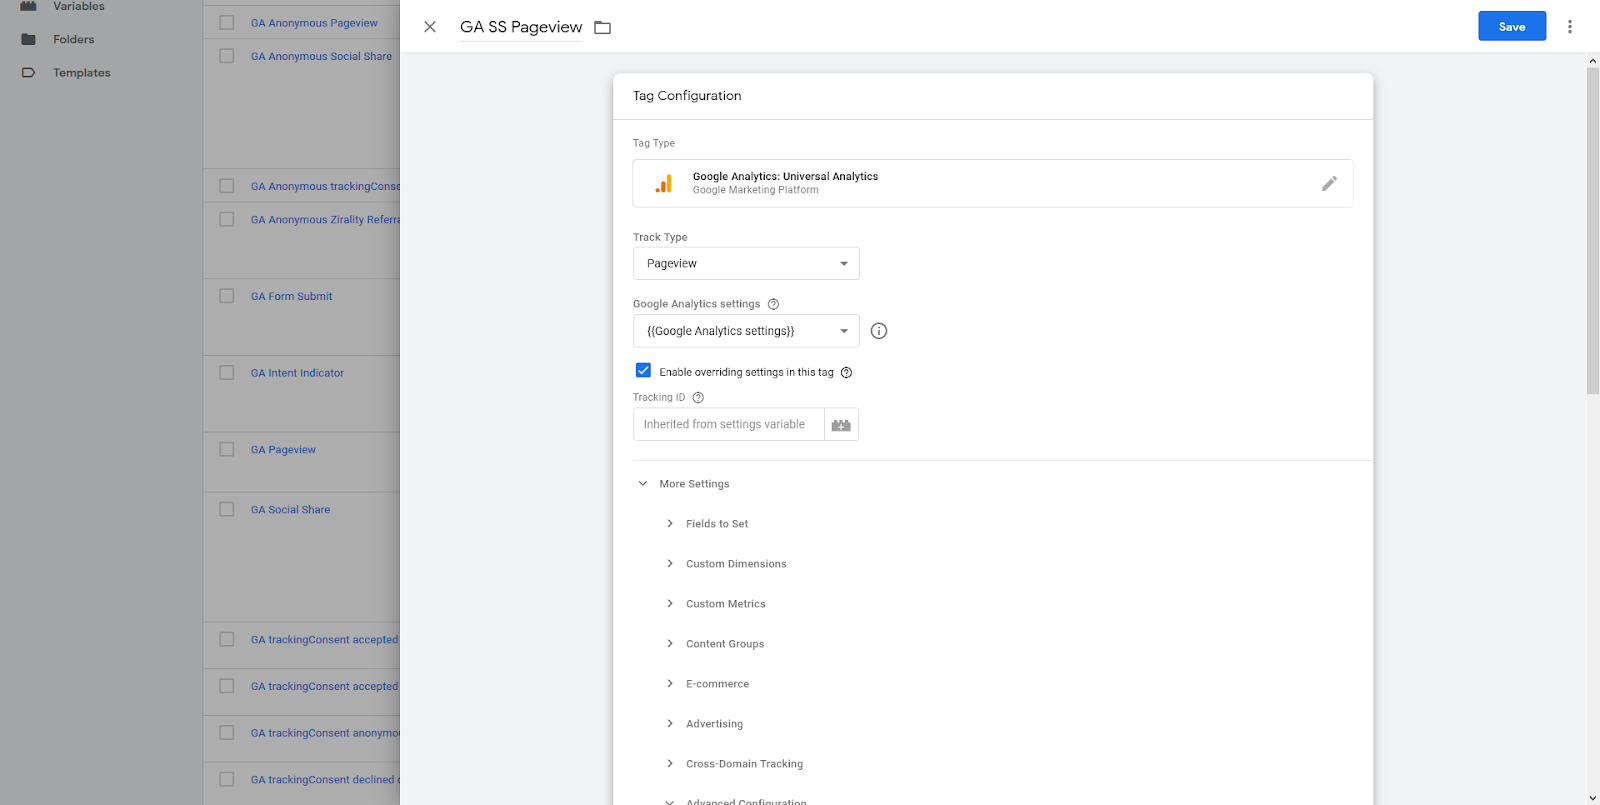
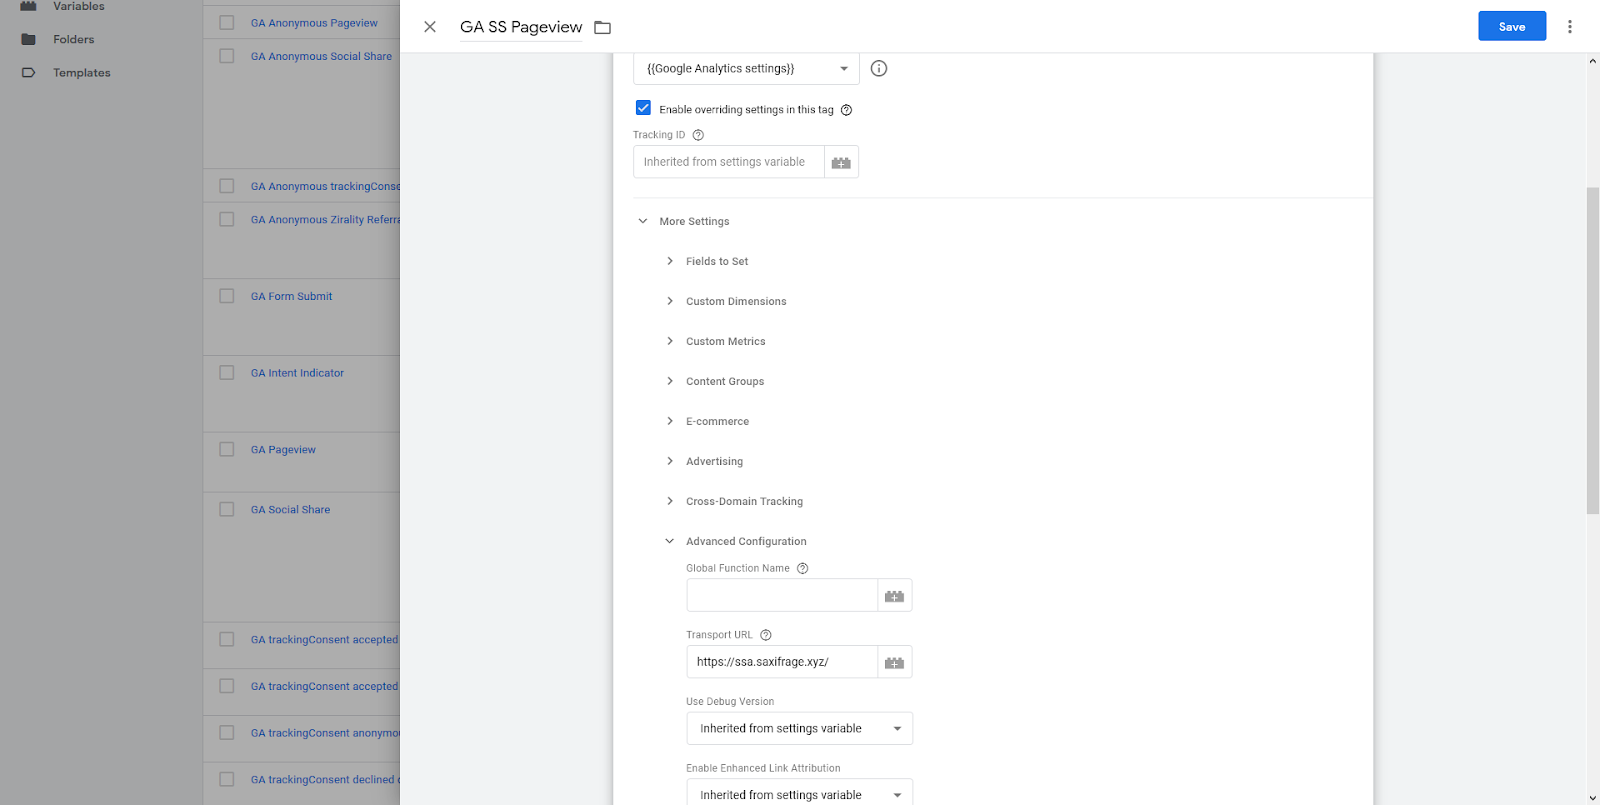
You can set this up as a normal pageview tag, with Google Analytics settings variable, but check the box to Enable overriding settings in this tag. Then scroll down to the Advanced Configuration section, and put your new custom URL (the one you sent the hit to) in the Transport URL field.
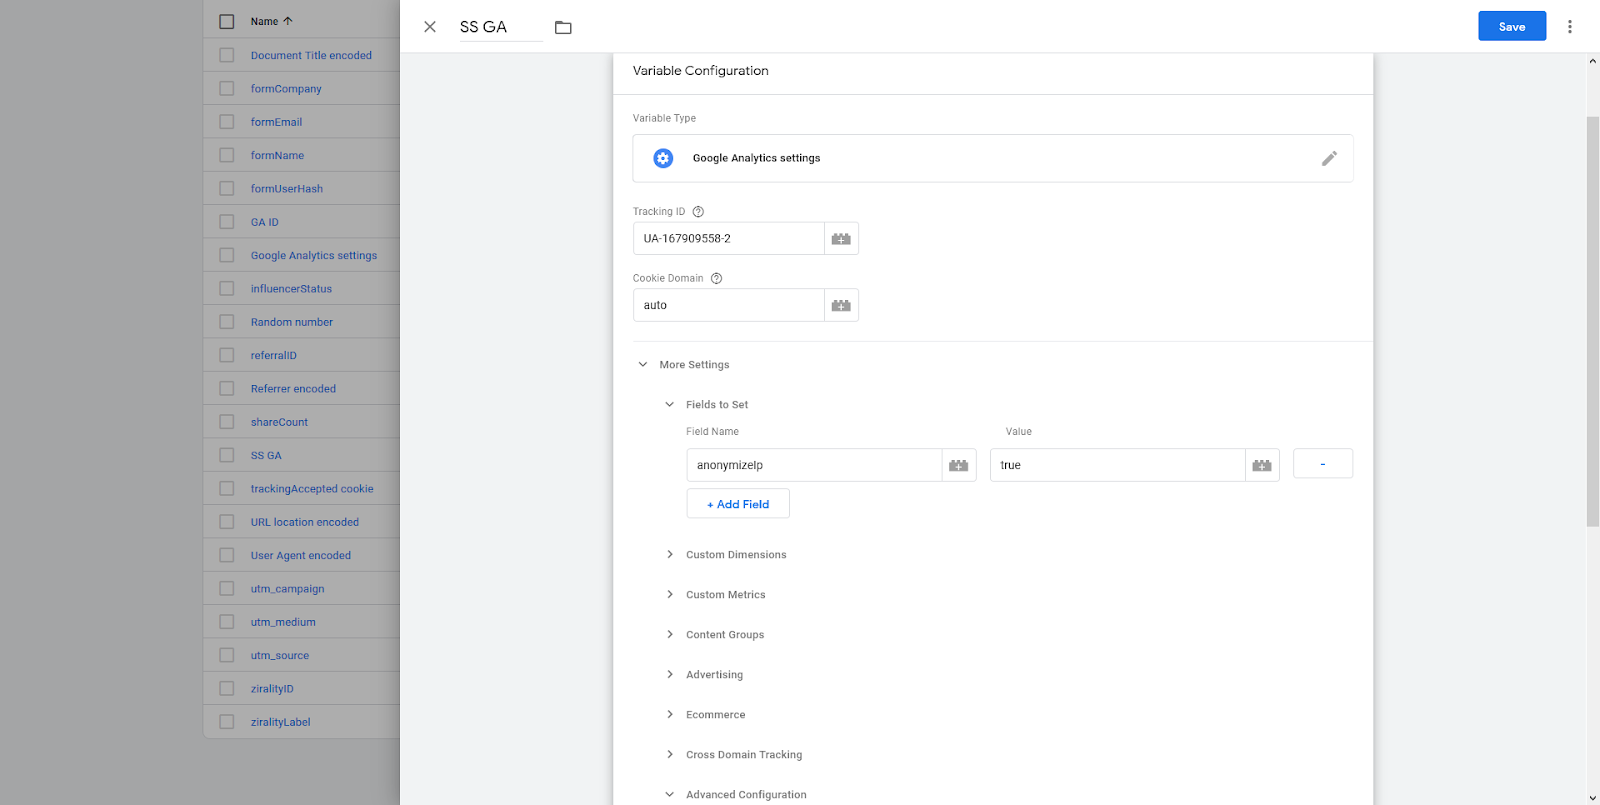
Also do the same in Google Analytics settings (for this I set up a new Google Analytics account, you might not want to mess with any existing implementation). I also in this case added an anonymized IP address field (Field Name: anonymizeIP = true, because like I said earlier, the goal here is to track pageviews not users, and you should anonymize by default, if you don’t have a good reason not to.
Finally when the container is published, go back to your Google Analytics account Realtime section and visit your website to check your visits are showing up. Go to obscure sections of your site so you show up easily if you already have website traffic, or enter the website with a unique utm_source and utm_medium parameter.

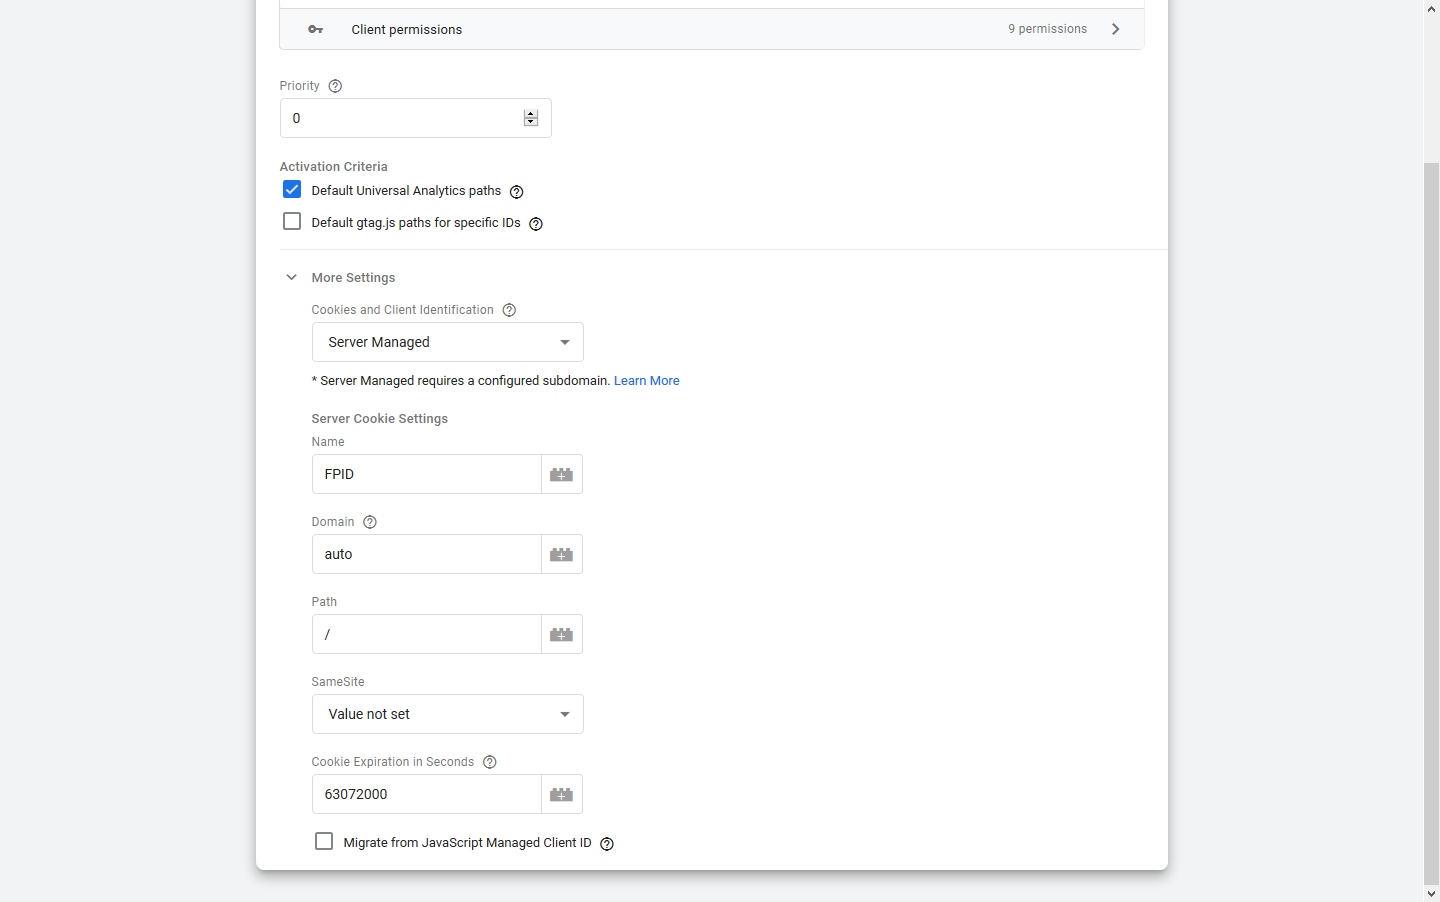
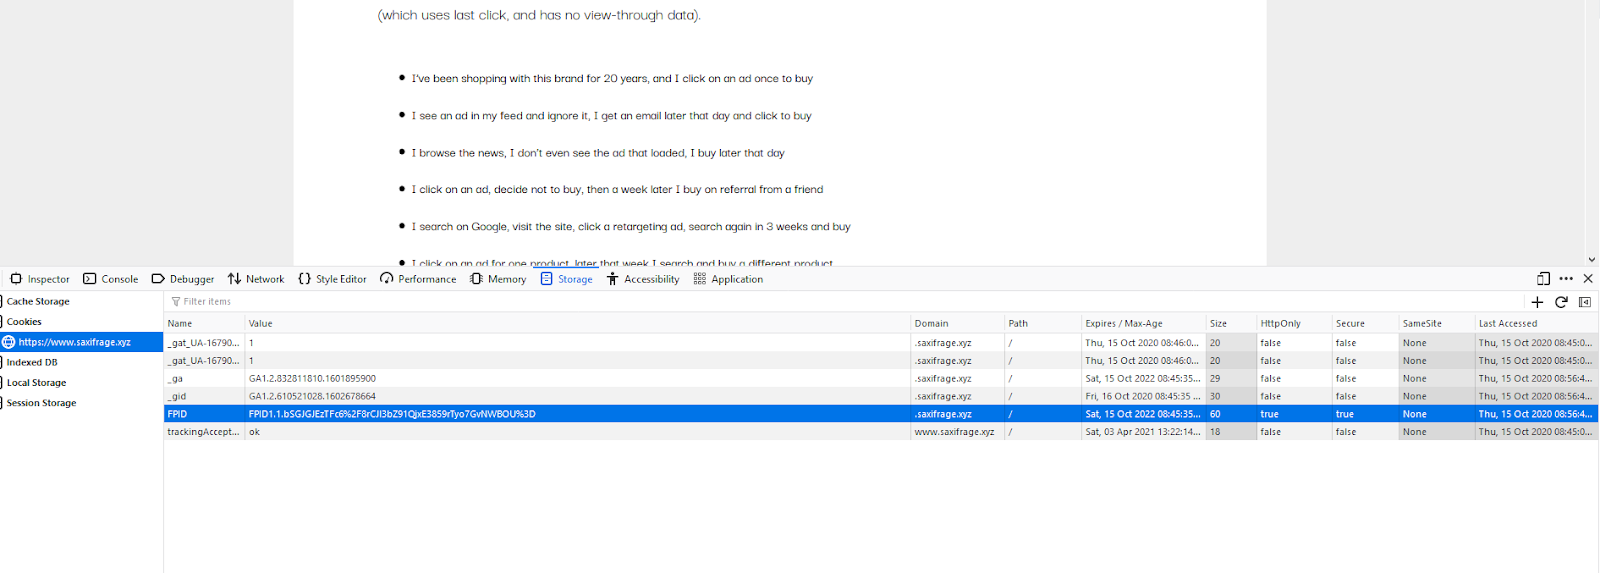
That’s it, you’re now running on server-side analytics. There’s a lot more you can do, for example pulling data from other APIs to enrich your user behavior data. Because it’s server side it’s tolerable to wait longer for a call to say the weather API, than it would have been client side. To see the other benefits you get from going server side, check out the FPID cookie that GA server-side sets by default.
You can see this configured in the ‘More Settings’ section of the Tag in the server-side container. It stands for First Party Identifier, and because it’s set from your domain via a server, it skips out on all of the rules Apple has for Intelligent Tracking Prevention, as well as ad blocking technology.
If you visit the website you can see this for yourself by right clicking and going to ‘inspect element’, then going to Storage. You should see a cookie that has an expiration of something like 2 years in the future, with HttpOnly and Secure values of true. This is now how GA recognizes returning users, so you should now hopefully avoid most scenarios of data loss!
Closing Thoughts
Even if this method works right now, it’s highly likely that you’ll need to change your analytics setup again in the future as Apple dances with Facebook and Google, blocking new attempts at workarounds. We should expect that at some point browsers will look at not just where data is being sent, but what data is being sent, and then there will be another arms race as more holes in tracking appear and more workarounds are added.
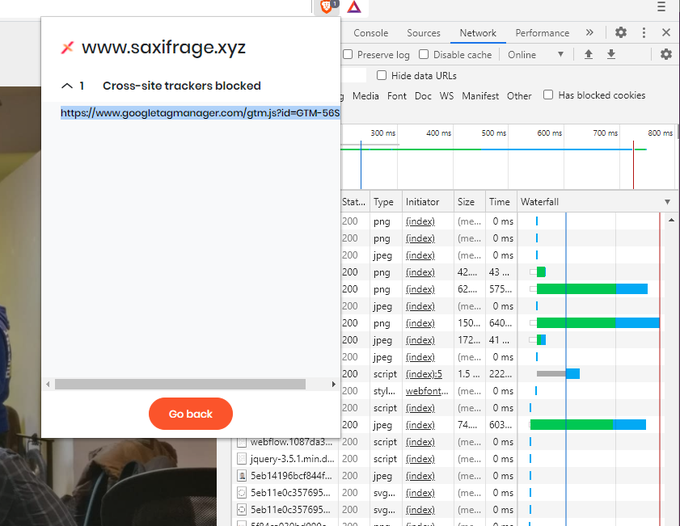
In fact shortly after implementing this, one fellow growth engineer pointed out to me that the Brave browser was blocking my tags. This happens because they’re recognizing the Google Tag Manager client side script, which is what’s sending the data server side in the first place. To fix this I’d have to hard code the call to the server side… but obviously then it gets harder for non-technical users to contribute events… and so the cycle continues!
I won’t weigh in further on the morality of tracking users who don’t want to be tracked, or how necessary it might be for businesses to understand how people are using their products. What I will advise you is that you should never see analytics as a ‘one and done’ or ‘set it and forget it’ task.
This field is already complex, but is seeing rapidly accelerating innovation and you should expect to be constantly monitoring the situation. Reevaluate your stack, switching vendors and test new methods (or work with someone who does). I’m also seeing more people trying alternative attribution methods like Marketing Mix Modeling / Econometrics. Of course another (completely valid) option is to step back from the bleeding edge and find other less complicated ways to understand your users to make your product better!